|
====================================================================
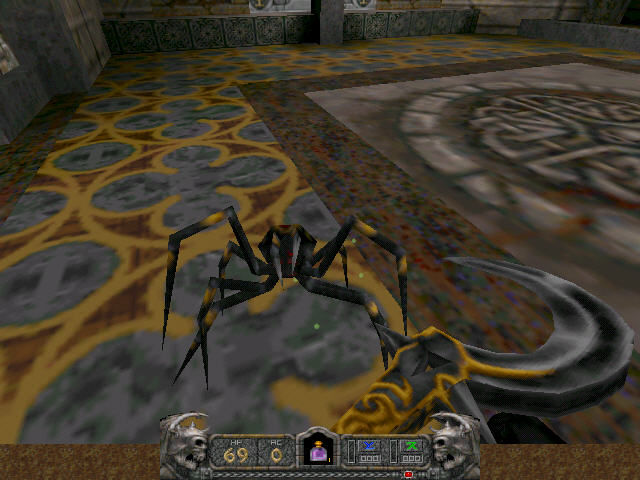
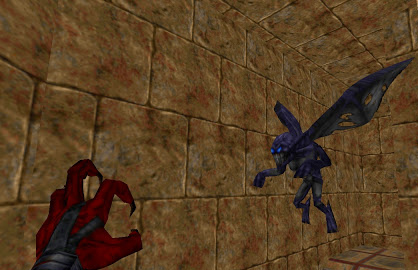
The Black Spider.
The most basic of all Hexen II creatures, Use
melee weapons against them, while playing the traditional range game:
backpedal after you strike, to keep your distance a step away from its
melee attack. It is pretty simple. Nonetheless, weaker close-combat
characters, such as the Necromancer and Assassin, should consider ranged
approach, - depending on what you can spare at that moment. Usually, in
the 1st episode - saving mana is more critical, while further on - ranged
attacks will become a staple solution for these pests (for the Necromancer
or Assassin) . Also, always look for any alternative means to dispatch
these enemies:, using environment and positional advantage, such as
attacking from above (where possible).
Also,
keep in mind that deep water is
deadly to all land-based creatures of Hexen II
(for the black spiders it doesn't have to be that deep) - so
whenever possible you certainly should take an opportunity to either lure
or push the spiders underwater.
Danger
factor: 2 out of 10
====================================================================
Knight Archer.
Knight
Archers are the epitome of "freebies" and are divided into 2 categories:
the ones that will actively walk toward you (they can't run), if they spot
you, - and the kind that will stand firm no matter what and attack
exclusively from a distance.
The
first type, due to their automatic tendency to walk toward you - can (AND
SHOULD) always be led to a some kind of
trap, or a position where you can hit them, but they can not hit you back.
This almost always will be a "corner trap" (yes, that simple) since these
dudes seem unable to walk around corners when you are in the melee attack
range; even though they don't appear to have a melee attack....So, hide
behind a corner, make sure they see you, - and as you hear them approach -
hack away! This tactic is imperative, if you want to survive, and
generally will (and should) be used whenever possible to trap any enemy
that has lost its way.
However, every now and then you will encounter Knight Archers that won't
move, and shoot you on sight. There are at least two ways to deal with them -
one: run toward them from a close cover, attack once - and quickly get
return to cover. Repeat. When a nearby cover is unavailable - you
can, with practice, close the distance by doing zigzag dashes, if your
time it right. Make a short angled dash as the Archer fires an arrow. NOT
BEFORE THAT - or it will not work. One dash per shot. Also, watch out for
double shots - sometimes an Archer will make 2 shots in quick successions.
This way you can work even without a cover, if you get good. However, it
won't work with multiple Archers.
Archers' projectiles are extremely fast, but it takes for them a second to
draw their bows, so it is possible to take advantage of that using various hit-n-run
tactics. Occasionally, you will also encounter Archer Lord - a variant
that
hits harder and much faster - plus, is 4 to 5 times more durable. Usually you will
need some additional help with this one: a tomed-up weapon, or magic items,
like Glyphs. Otherwise - bring enough mana and a big gun.
Corner ambushes work against Archer Lord - but he can (and will) get out
of the trap and will blast you repeatedly at point-blank range. So as this
about to happen - either reposition, or use Repulsion Discs to reposition
him, or - pre-damage him with other weapons before corner-trapping. In the later episodes Archer Lords become much more
common, and will mandate both firepower and cover - to successfully deal
with. Especially so - when there are several of them at once.
Danger factor: 1 out of 10 // 3 out of
10 // 6 out of 10 respectively
======================================================================
Fire Imp / Ice Imp.
Imps
are tricky, fast and very dangerous, mostly because they move without making any sound at all.
(there is a sound when Imp is active, but no sound to indicate movement).
As an airborne creature - Imps immediately use vertical positional
advantage over you, if the structure where the fight takes place - allows
it. And since they can do it without making a sound - this maneuver makes
them an enemy not to be underestimated. Also, Imp's dash attack is
impossible to avoid, unless you use solid cover or a Disc of Repulsion. If you have Discs of
Repulsion to spare - then you can counter-attack the Imp, thus sending his
projectiles back to him, (if your timing is right) - or successfully
defend and open a window for your own attack. Fortunately, these creatures
are physically weak, and all you need is a few of well-placed hits.
With that in mind, remember, that while
fragile, Imps pack a serious punch. Their attacks are among the deadliest
in the game, and they can send you to the next world unexpectedly fast,
especially the Ice Imp variant.
All characters should take a ranged
approach when fighting Imps, except for Paladin
- who should always attack from cover with his Vorpal Sword. Crusader may
try to use his hammer in the same manner, but should be ready to switch
back to ranged attacks. Being careful and observing all 360 degrees
around, once you hear the Imp's "alive" sound - is the key to taking them
down rather with ease. In an open space, these creatures should be your
first priority target.
Danger factor: 5 out of 10
====================================================================
Hydra.
Despite what's written in the Hexen II manual, Hydra (thankfully) can only
attack underwater, in its natural habitat. Hydra blends very well with its
surroundings and can be hard to spot sometimes. It can fire as fast as in a
split-second, dealing heavy damage AND taking away your vision for a short
time. If Hydra gets to repeat this process - you die.
Your
best tactic, is to survey the water carefully from land - and dispatch it
safely from there. Or, lure the Hydra close to the surface of the water - then get back to dry land and
kill the creature
easily with whatever weapon that can get to it. Hexen II has but a handful
of underwater areas, so encounters with this beast are rather few and far
between.
If you
have no choice but to fight Hydra underwater - keep your Repulsion Discs
ready, (in case you have them), otherwise, move slowly and combine
shooting first with getting back to cover. If you shoot the creature
before it shoots you - and do so with weapons that are powerful and fast
enough
- it should be a flawless kill. Remember that Paladin can shoot around
corners.
Danger factor: 5 out of 10
======================================================================
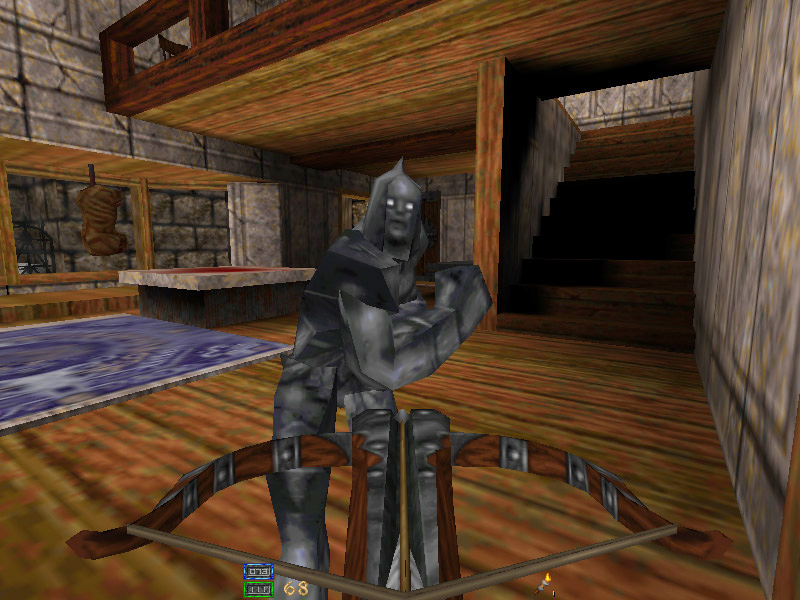
Iron Golem.
A powerful creature, that
is not unlike a fast version of a bulldozer that
is out to kill you. Stone Golems will give chase if they spot you, and if they
get a firm lock on your position - they switch to an "attack mode", which
uses bursts of speed combined with contact-damage, that inescapably grinds
you into the pavement - and there is not much you can do about it. So you
definitely don't want these things getting that close to you.
You
should NEVER fight any type of Golem in a conventional way. There are
exactly 3 instances in the entire game, when you have no choice but to do
just that. And 2 out of 3 times it's a rather nasty ambush. Your
tactics for 99% of the game - should be leading the Golem to a place where it cannot pass, or
cannot reach you - or both.
Usually, you are looking for steep changes in
elevation - be it incline or decline,
which the Golem cannot cross. Then, carefully approach and hack it to
pieces. Use your free weapons to do so. Paladin should avoid using his
sword for that task - since destroying it will take a lot of mana, - for
which there is no reason at all, since Golem is trapped.
A
corner-ambush can work on Golem, but it is not fool-proof. The creature
may get around it and catch you in its "bulldozer mode", which will be the
end of the fight. Nonetheless, it is very much possible.
Danger
factor: 3 out of 10
====================================================================
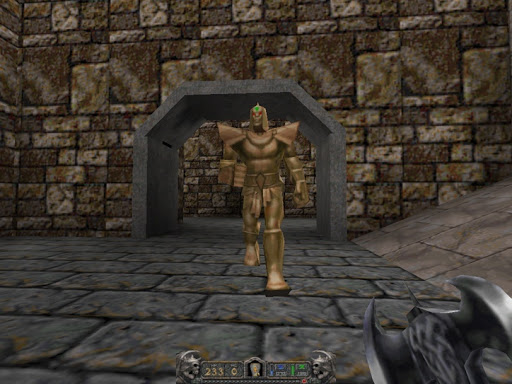
Bronze Golem.
Bronze
Golem starts to encounter in the 2nd episode and onwards. Retaining all the characteristics of its
metallic cousin,
there still are two some differences: it has much more hit-points, and two -
also has a ranged attack. This Golem can fire a slow-moving
tracking missile, which is powerful and not so easy to get away from. (use
Repulsion Discs)
And
yet, the tactics against this guy are exactly the same...lead the Golem to
a place it cannot cross, approach him to trigger his melee attack (so he
won't fire) - stay just barely out of his fists' range - and hack away.
Use free weapons only.
Toward
the 4th episode, you will encounter yet another type: "the Superman Golem"
- he has a devastating attack, akin to Superman's eye lasers...and
he can cause small earthquakes by stomping his foot. Well, this one is so
obsessed with his own hype, that despite such strengths - he mostly walks
around looking for a mirror to fix his hairdo (wait...what?!) Therefore,
the tactics are once again - the same. Just make sure to get behind cover
if he fires the laser.
Danger
factor: 5 out of 10 // 6 out of 10
respectively
======================================================================
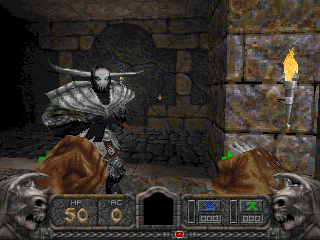
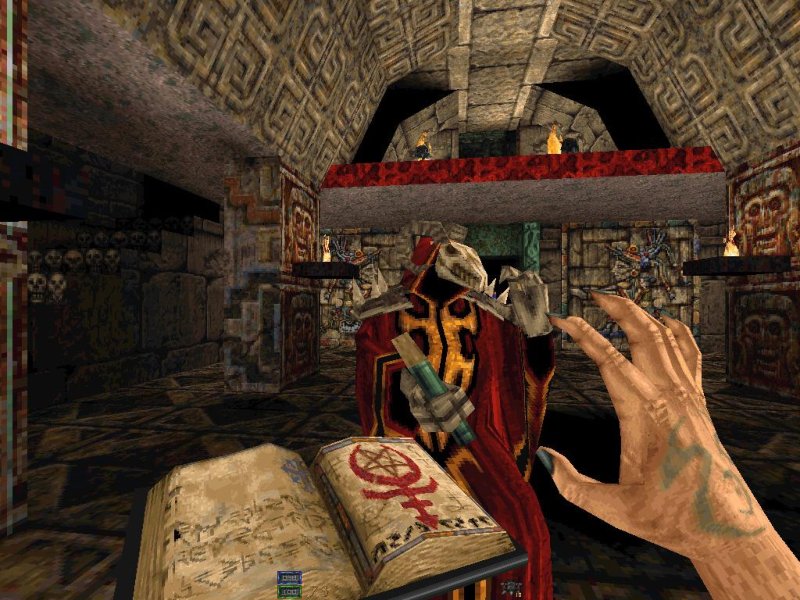
Skull Wizard / Shadow Wizard.
This dark being of sorcery is, in fact, far less dangerous than the
different manuals, guides and FAQ / WIKI lists are trying give him credit
for. The only scenario where he would pose a threat - is if he catches you
in the open area, and you have no mana or no ranged weapons. The main
trait of the Skull Wizard is the ability to disappear
and teleport - which he uses both to attack swiftly from unexpected
directions, as well as to evade, - when fired upon. Shadow Wizard is
extremely effective at the latter feature, Skull Wizard - not so much.
Both
versions come with several weaknesses, which prevent either to be actually
threatening: one - their skull-projectiles can be destroyed using fast
weapons. Two - they have a rather slow rate of fire. If not for that -
Skull \ Shadow Wizards would really pose a problem, but - this is not the
case here.
By the time you encounter Shadow Wizards - end of the 4th episode, you
will be fully armed and ready, so they should not be an issue. The trick
is not to play into their game:
don't try to shoot them as soon as one teleports in: LET HIM SHOOT FIRST,
and as he almost fires - unload with your fastest weapon. Due to the
weaknesses described above - you will be able to trump his attack rate
destroying his projectiles and scoring hits in-between - especially if you
add a gentle circle-strafe as you blast away - to get better angles and to
make him shoot air. Then repeat. Shadow Wizards have quite a lot of HP, so
you do need a good supply of ammo for the battle, - but once you get the
hang of it - he is not a threat at all.
In the first episode, when your character is still underpowered - you will
have to fight Skull Wizards either melee-style (Paladin only) or using
weaker weapons (everyone else). When that happens, - position yourself in
a way which limits the number of places where the Wizard can teleport
(easily achieved by having a wall or a corner behind you - a great tactic
in any scenario). Wait for him to appear, (move back and forth a bit, if
he doesn't appear) then let him fire a shot - and instantly dodge behind
cover, - make him WALK toward you, as opposed to teleporting. Then pop out
and attack. Repeat. If the Wizard walks toward you when you're behind
cover -
then a plain old corner-ambush easily wins the fight. You can also
counter-attack his projectiles with Repulsion Discs, and then get a couple
of slashes / shots. In the 2nd episode, Paladin
-
should combine the sword for the first attack and then look to trap the
Wizard next to a wall - to take advantage of the Axe's double damage
ricochet hits. Or employ the basic tactics of overpowering his attack rate
- like other characters would do.
Danger
factor : 3 out of 10 // 5 out of 10 respectively
====================================================================
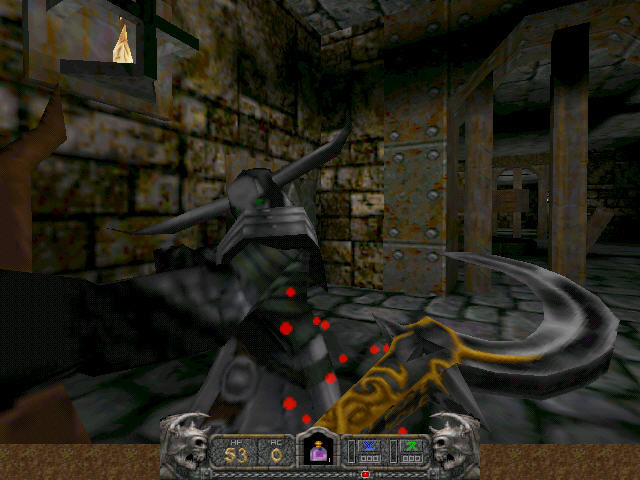
Scorpion / Black Scorpion.
Scorpions encounter right from the beginning of the 2nd hub, and
appearances may very well be deceiving. It is yet another enemy, which
seems like is built for a melee tackle - but, this could not be more
wrong. Scorpions have a lock-on attack pattern, similar to that of a
Golem, and they can whittle your health bar faster than you can blink.
Scorpions require a ranged attack to defeat them successfully . Although,
it pays off to count how many ranged hits (for each weapon) it takes to
kill them - and then switch the last attack to melee. This tactic, by the
way is useful for all enemies.
Black
Scorpions are considerably more durable, hit harder - and thus are more
dangerous. Attack from a distance, as soon as you see one - and forget
melee, whatever the class.
Glyph
of the Ancients works well against these creatures too.
Danger
factor: 5 out of 10 // 8 out of 10 respectively.
====================================================================
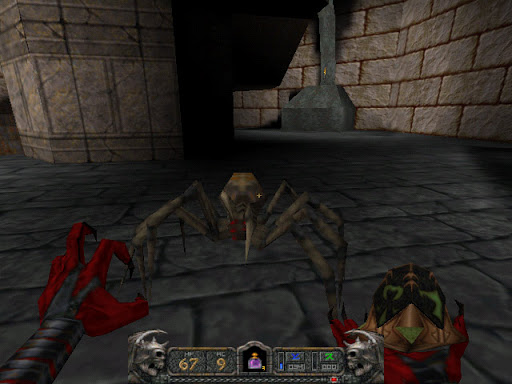
Grey Spider.
Another one that the manual got all wrong. It says that the black spider
is the deadlier of the two. Wrong. This is as far from the truth
as Earth is from Mars, as these creatures have absolutely nothing in
common - in terms of the way you deal with them. Black Spider is more or
less a cannon fodder. Grey Spider, on the other hand - is a top-tier
enemy, which should only be approached with a powerful ranged weapon at
the ready. In the first episode you encounter baby versions of this
beastie in a couple of places. Make no mistake - the real deal makes them
look like a joke.
Don't
even try melee with these things, no matter the class, Tome of Power or
other whirlygigs. (unless Paladin, powered-up Sword) This creature is formidable. It can close distance
fast, attacks in a rapid-fire mode,
and has a ton of health points to boot.
It will
pretty much ignore blue-mana weapons due to down-scaling, (unless
Necromancer class) and if you're strapped for green mana - then using a
powered-up version of your other ranged weapon might be your only sensible
option. Especially when faced with several Grey Spiders at the same time.
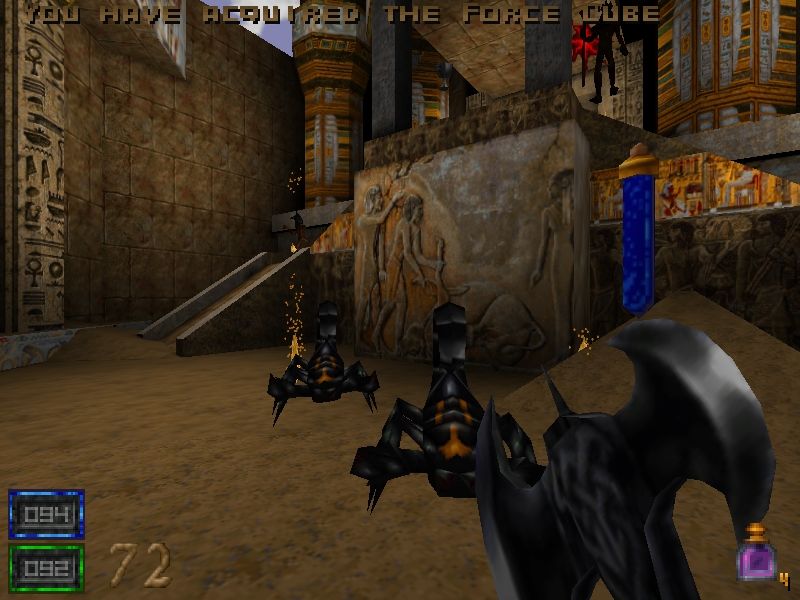
Stone of Summoning / Glyphs / Force Cube help as well...Discs of Repulsion - if
they manage to get too close, which they shouldn't...
Danger
factor: 7 out of 10
======================================================================
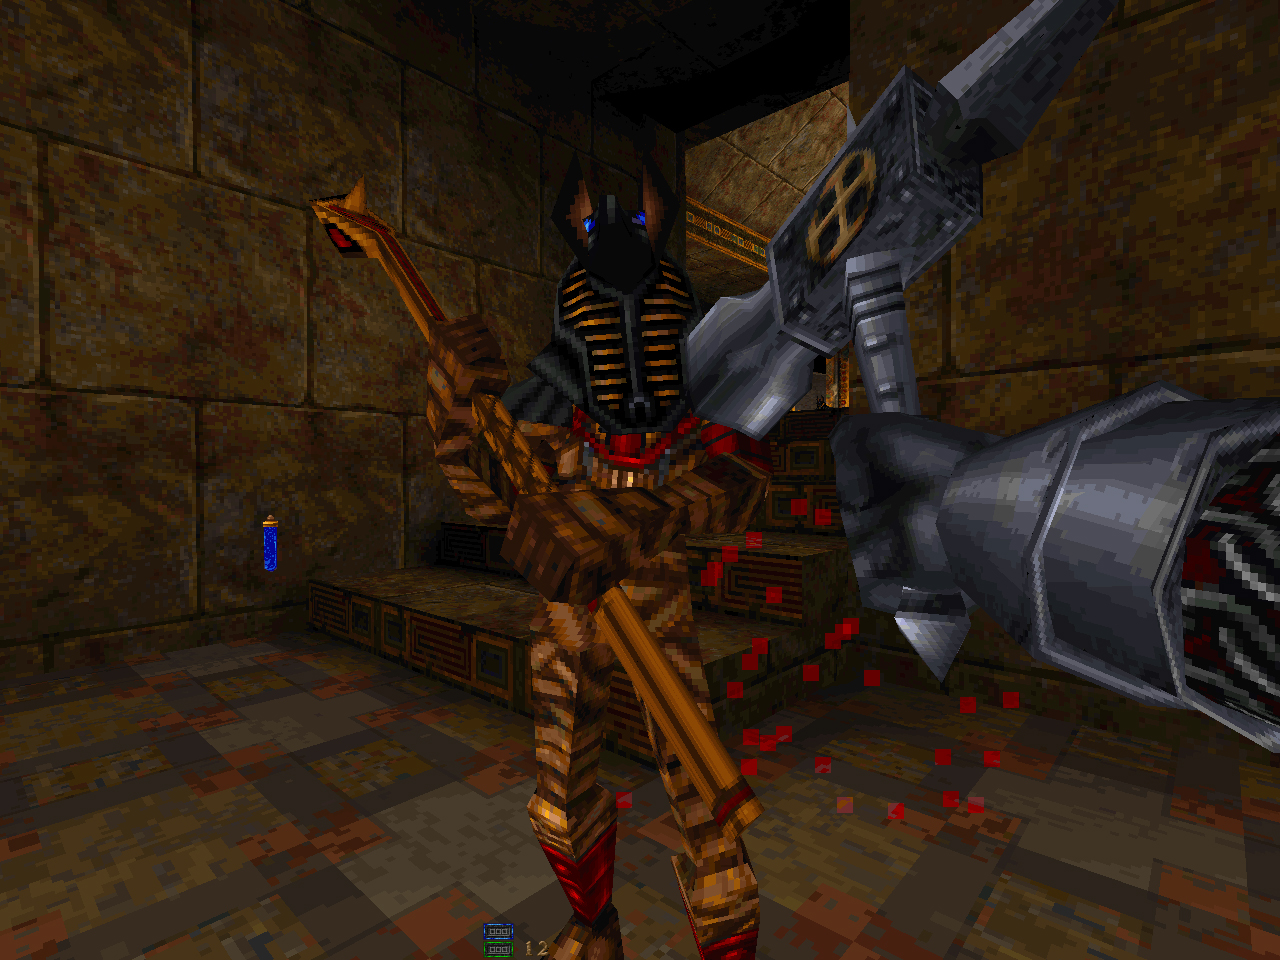
Mummy Lord.
You only find these mummies in the third, Egyptian hub - and by itself,
this enemy does not pose a threat, if you know its weakness. But when
accompanied by other monsters, especially by more Mummy Lords, - this can
get dangerous and fast.
Standard Mummy
is like an upgraded version of the Knight Archer. They can fire three
times faster than an Archer Lord - and go full-auto rapid fire while at
it. Unless you are very far and have a solid cover, - that's gonna render
every other scenario - a no-dodge zone.
Mummy
Lords also use ground fire attack, - which is extremely deadly, cannot be
deflected and can even cut corners and pass through certain walls. If
either of the two would stand their ground and just fire at you - this
would be a major pain...
But,
there is a huge silver lining right there: these creatures, unlike Archer
Lords - have a melee attack. And once you get into their melee range -
they forget their heavy weapons immediately and switch to trying to smack
you with their staves, while slowly inching toward you. This is their
weakness. Just get them into melee mode, and hack away while timely
backpedaling to avoid their strikes. Corner ambushes work wonderfully to
initiate this tactic, even though it can work if approaching head-on
quickly, from cover.
It
takes a little bit of practice to get the timing and distance dialed in,
but nothing major there. Even if they land a hit every now and then - no big deal. It is nothing, compared to what they can do with their ranged
weapons. Paladin should use the gauntlets,
- and not the sword for this tactic,
since sword hits will push the mummy back, offsetting the pattern - and
making the creature return to its main weapons....
A note
of import: you are limited to fighting only one mummy at a time, using
this technique. Separate and destroy others enemies first, if more
you encounter more than one Mummy Lord If you get in a crossfire by
several Mummy Lords (let alone joined by Ice Imps) - you'll be dead in a
couple of seconds. So retreat, and play defense.
Danger
factor: 5 out of 10 // 7 out of 10 respectively
====================================================================
Werejaguar / Werepanther.
These guys are like the Agent Smith of Hexen II. They can run, dash, leap, roll...have
hyper-speed, super-strength - and whatever else you want to add to the
list. Only these
fellows don't come with a ridiculous cape-n-tights: they brandish rather sharp swords, - with a particularly evil looking serrated blade for
the elite variant of the Werejaguar: Werepanther.
They
probably were the prototypes of the original Unreal's Skaarj
warriors, since the similarity is uncanny...Fortunately though, the Werejaguars or the Werepanthers do not
have the polished intelligence of the Skaarj. Werejaguars often forget to
press their attack, and often forget to evade, they even occasionally
forget where you are....With their penchant for jumping - they may often
jump to places where they get stuck, allowing for an easy kill; or even
jump to their death into lava. They can also be pushed into lava and
water, using the Repulsion Discs...
However, even with these lapses - when the surroundings spare them the
flaws of AI, - these creatures are absolutely lethal. They can churn out
destruction at an incredible rate, thriving particularly in closed spaces,
when you have limited options of evading their attacks.
Fortunately, Werejaguars are not tanks, and do yield reasonably to the power of
green-mana-based and the ultimate weapons. You will need either of the two,
to confront these feral warriors successfully. Use Discs of Repulsion to
keep them at bay, and Force Cube or Stone of Summoning - to
assist you in a fight, until your arsenal becomes more potent (Assassin,
Demoness). Beyond
the 1st hub, these two classes can barely make two steps without their ultimate
weapons....
Danger
factor: 6 out of 10 // 7 out of 10 respectively
=====================================================================
Medusa.
Medusa is
a unique enemy in Hexen II. It is the only one of a kind, who can decimate
you with almost absolute impunity, if you don't prepare for this fight first.
When you hear the sound of a Medusa nearby - prepare for it. Decide how
you are planning to take it down: combat or magic, and ready all the items and weapons that
you may need.
Medusa fires a projectile which can pass through several solid walls and always lands dead on. (an achievement that
even boss monsters cannot pride themselves on). Fighting Medusa
conventionally and successfully - is, nonetheless, possible. It does
require that you are good with Discs of Repulsion for deflecting her
projectiles. If you have enough discs, and enough mana - then you can
definitely try that.
Otherwise, your best tactic is - use the Ovinomancer Seal and turn Medusa into a lowly sheep, killing
it easily. So make sure to find and keep all of the Ovinomancer Seals in
the game. This is the main enemy you save these artifacts for.
Don't
get too close to Medusa, lest it locks you in its gaze attack. This turns
you into a corpse very quickly, and is almost impossible to get out.
Either quickly sheep it on sight, - or prepare for battle with timed
counter-attacks and guns blazing.
Danger
factor: 8 out of 10
Fallen Angel.
These
two abominations are the epitome of death in Hexen II. They are only
second to the boss monsters, in their ability to send you to the
afterlife. Not only they fire several types of some heavy missiles (some
of which can even stun-lock you) - this thing is not unlike a a mini-Cyberdemon.
And yet its most dangerous ability is to turn reflective - much like
Centaurs did in Hexen 1 - and they do it much faster and better timed than
did their predecessors.
Cover
is mandatory when facing this creature. And yet, there is a way to deal
with them rather effectively: Force Cube. This is the item you need
accompanying you in a fight - to defeat a Fallen Angel successfully. While
the Angel is focusing on the Cube, fire away when it's vulnerable. Paladin
may even consider melee in such scenario, with some practice. Other
characters should use their more powerful weapons for that. Necromancer
can use either of his spells.
Danger
factor: 9 out of 10
Fallen Angel Lord.
As if
standard Fallen Angel was not enough - now you have a Lord variant too. It
is pretty much the same as the standard Fallen Angel, but is more durable,
does more damage, has faster reaction time, its attacks are nearly
impossible to evade - and it has an additional attack mode: a laser-like
attack, similar to the "Superman Golem". This attack dismantles you
completely in 2 to 4 seconds tops.
Force
Cube is "too late too little" for battling this monstrosity. And yet - not
all is lost. Stone of Summoning is your friend :-) Save all Stones of
Summoning EXCLUSIVELY for this particular enemy. Pop the stone, and let
the summoned Giant Imp take initiative. Then, once the Angel no longer
obsessed with turning you into a matchbox of pixie dust, - focus your best
attacks on the Angel as it goes toe-to-toe with the Imp. The Imp does
heavy damage to this ethereal predator - at times even killing it. Watch
for the reflective mode when firing.
Danger
factor: 10+ out of 10
|